VK2DOT Packet & Web SITE
Generated by Rod McCosker -
XR32
Remote Node Setup:
UNDER
CONSTRUCTION – 19th Jan 2013:
Last updated 29-Feb-2012
Web Address - http://vk2dot.dyndns.org/XR32/Remote_Nodes/Remote_Node_Setup.htm
For Version 2 of this
page for all Remote Nodes after the 1st of February 2012 eg for VK2DLI goto Version 2:
HISTORY:
The original Remote Node was setup at the VK2AAL’s QTH at Barrick Point, which is located approximately 150Km south of Sydney. Barrick Point is also close to Wollongong. The original system was an old laptop, with low memory and speed; The operating system was DOS with the XR16 XRouter packet radio application software.
The second series of Remote Node setup’s was based on similar laptops with low memory and speed but using the Linux operating system running in command mode, and using the AX25 and Node application software. The conversion to Linux was based on the availability of packet Ethernet drivers for DOS availability. The Linux systems automatically installed their own Ethernet drivers. Command mode was used for reasons that if we used X-Windows, additional memory was needed, plus could not be used on old slow laptops.
The third series of Remote Nodes came into existence, when XR32 was developed. We had found that Remote Node sysops had user problems using Linux. If any problem occurred with a remote Node, the remote sysops had problems fixing up the Linux system. It was found that old laptops with only 64Mb up of memory and 150Mhz CPU speed could be used with XR32 and the Windows 2000, MicroXP or TinyXP operating systems.
XR32 Version 201b works well on a 233Mhz Toshiba 2500CDS laptop with 32Mb of memory and running the Windows 2000 operating systems.
NOTES:
Laptops with –
32Mb of memory, use Windows 2000 with XR32.
64Mb of memory, use MicroXP with XR32.
128Mb of memory, use TinyXP with XR32.
MicroXP operating systems a stripped down version of Microsoft XP. As you are using this operating system in conjunction with XR32 as a Remote Node, you are only interested with the COM: port, Ethernet connection to your LAN and running XR32; The window size is going to be restricted, There will not be a window saver with MicroXP – so when a sysop is not attending, make sure the laptop lid is closed, etc. Do not forget to setup your battery usage via Control Panel and Power usage.
TinyXP operating system is less stripped down than MicroXP. If the laptop you are going to use for your Remote Node has sufficient memory, I would recommend that you use TinyXP. It has been noted over the years of operating TinyXP and MicroXP, that a virus checker is not needed.
Linux with Wine [using X Windows] requires a more powerful laptop and more memory than required by TinyXP. It is hoped that when LinXR32 becomes available, it will run on Linux in command mode, thus enabling amateur packet to use old laptops.
XR32 Remote Node Setup without NDISXPKT driver:
Please NOTE: This Version of the “VK2DOT Remote Nodes”
contain only one IP addresses – This version does NOT use the NDISXPKT packet driver software, This
setup will run on Windows 7 & 8, Windows XP, TinyXP
or MicroXP.
Files to setup a Remote Node.
STATISTICS: Running a Dell Latitude CP laptop – 233Mhz, 128Mb of Memory & 6Gb of massstorage –
Running MicroXP, NDISXPKT, StartUp Delayer, TightVNC-2.6.4 and XR32 Ver 201b –
Memory used - 46.3Mb
CPU usage - 15%
The following addresses are used at the VK2DOT QTH LAN to
test the XR32 remote Nodes.
Callsign Windows IP XR32 IP TCP/IP Town
VK2AAL 192.168.1.12 192.168.1.12 44.136.16.200 Barrick Point
All of the above nodes are connected to the XR32 Test Local
Node VK2DOT –
Callsign Windows IP
XR32 IP TCP/IP Town .
VK2DOT-1 192.168.1.2 192.168.1.3 44.136.16.18
At this point in time, when the remote node is delivered –
Then remote sysop will have to change their Laptop IP parameters to reflect
their own LAN setup. Below are changes necessary for such a change –
Change Windows
IP Number:
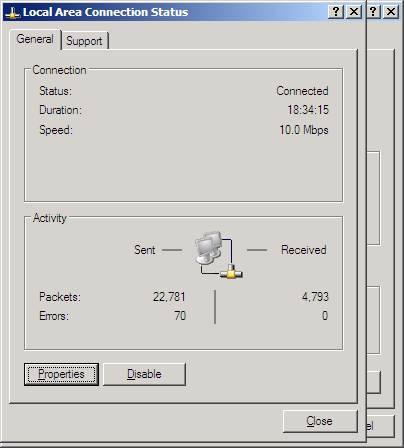
Go to the main Window of Windows and mouse click on the LAN
icon. This will start the change of your IP address, of your Windows Kernel
TCP/IP stack.
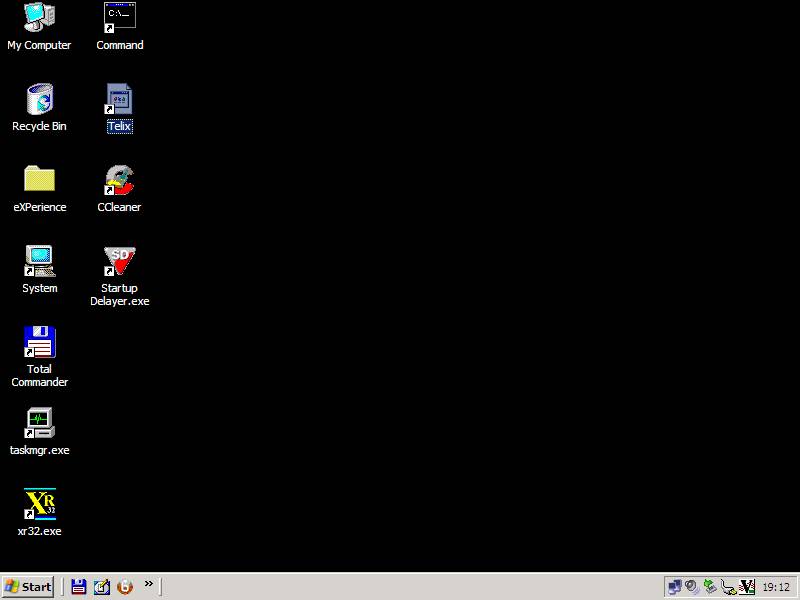
LAN icon ^
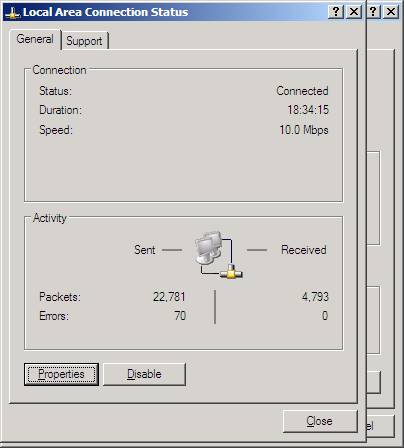
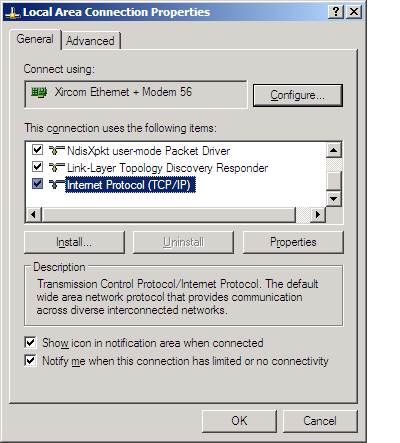
Hold the right mouse button and select “Properties” in the menu that appears
below.
Highlight “Internet
Protocol (TCP/IP)” below; Then mouse click on
Properties below.

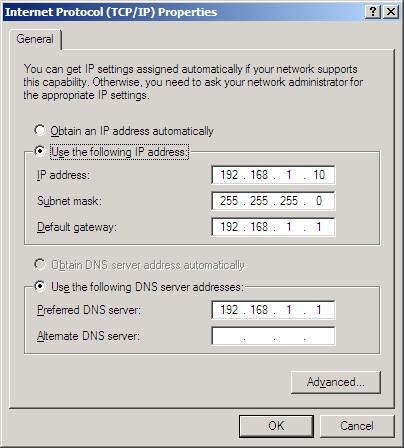
Below – change “IP
address”, “Default gateway” and
“Preferred DNS server” to addresses
appropriate to your LAN and ADSL Modem setup.
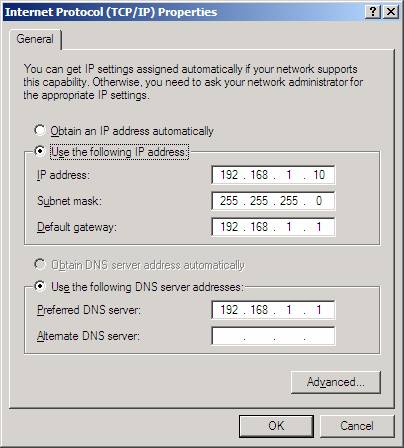
Mouse click on “OK”
three times.
XRouter.cfg Setup:
This will start the change of your IP address, of your XR32
TCP/IP stack.
;==========================================================================
; Station Identification:
;==========================================================================
;
; Node callsign: Up to 6 chars plus optional SSID between 1 and 15
; This is the callsign used for all L3/4 operations, and the default
; for L2 operations on each port.
;
NODECALL=VK2DLI
;
; Node alias: Up to 6 characters.
; Aliases beginning with "#" are not displayed in node lists, and
; are typically used for "linking only" nodes.
; You should preferably choose an alias which is geographically
; relevant
beyond your own local area, for example BRSTOL,
; or BRUM are good, because users can recognise them in node tables,
; whereas GAB1 and WBA are bad - where on earth are they?
;
NODEALIAS=NOWRAW
;
; Callsign for APRS IGATE (optional).
; This callsign is used by the Igate to identify itself in beacons
; and third party messages. If omitted, it defaults to Nodecall.
;
; APRSCALL=MB7Uxx
;
; Callsign for console operations. You can set this independantly
; of NODECALL or you may set them the same. You may at any time
; override this callsign using the "linked as" command.
;
CONSOLECALL=VK2DLI
;
; IP address for IP routing. Your local IP co-ordinator should
; be able to assign you one. If you aren't routing IP (shame on
; you!) comment this out or set it to 0.0.0.0
; The router normally uses a single IP address for all ports, but
; you may specify additional addresses for each port.
; (If you are routing, remember to define routes and hostnames in
; IPROUTE.SYS and DOMAIN.SYS respectively)
;
IPADDRESS=192.168.1.12
Change the above IP address of 192.168.1.12 to a IP address not used on your LAN.
VK2DOT’s IP address –
;--------------------------------------
;
PORT=18
ID=AXUDP Link [XR ] VK2DOT-1 XR32
INTERFACENUM=14
IPLINK=220.245.50.125 ; vk2dot.dyndns.org
; IPLINK=192.168.1.6 ; LAN for testing
UDPLOCAL=10098 ; For Remote Nodes only
UDPREMOTE=10098 ; For Remote Nodes only
QUALITY=220 ; AXUDP connection Quality
PACLEN=236
MHEARD=5
FRACK=5000
BCAST=FBB,MAIL
BCFROM=VK2DOT-4 ; From BPQMail BBS
PIPE=1 ; Fbb Headers for RF Port for WinPack Users
PIPEFLAG=1 ; UI Frames "NOT" addressed to nodecall/alias
ENDPORT
;
;--------------------------------------
Above, remove the ; from the start of IPLINK=220.245.50.125 and place in front of IPLINK=192.168.1.6. Thus you now have the correct IPLINK to the
VK2DOT XR32 Node. NOT the IPLINK used for the VK2DOT LAN.
Modem Setup:
Port 5800 to Port 5800 on machine 192.168.1.12 for TCP Named
TCP 5800 or
another address you have changed above to your Windows Kernel IP stack
addressed.
Port 5900 to Port 5900 on machine 192.168.1.12 for TCP Named
TCP 5900 or
another address you have changed above to your Windows Kernel IP stack
addressed.
Port 10098 to Port 10098 on machine 192.168.1.12 for UDP Named UDP 10098 or another address you have changed
above to your XR32 IP Stack address.
Port 21 to
Port 21 on machine 192.168.1.12 for
TCP Named UDP 21 or another address you have changed
above to your XR32 IP Stack address.
Port 23 to Port 23 on machine 192.168.1.12 for TCP Named UDP 22 or another address you have changed
above to your XR32 IP Stack address.
Ports 5800 & 5900 are used by the TightVNC software. This software allows VK2DOT to remotely
restart XRouter or other software on the Remote Node.
TightVNC uses a USER Name and a Password to use this
facility.
Port 10098 is the
UDP connection between the Remote Node and the VK2DOT node,
Port 21 is the
FTP port. XRouter has FTP built in. Unfortunately TightVNC has a problem transferring files,
we have not sorted this out so we have to use the XRouter
FTP facility. FTP uses a USER Name and a Password to use this facility; These are contained in the “PASSWORD.SYS” file.
Port 23 is the
Telnet port. This enables you to connect to your XRouter
from the internet. This is controlled by file – “ACCESS.SYS”. It has been setup to only need a Callsign
to Login. If you require users to need a password – then edit file – “ACCESS.SYS”.
<eof>
XR32 Remote Node Setup with the NDISXPKT driver:
STATISTICS: Running a Dell Latitude CP laptop – 233Mhz, 128Mb of Memory & 6Gb of mass-storage –
Running MicroXP, NDISXPKT, StartUp Delayer, TightVNC-2.6.4 and XR32 Ver 201b –
Memory used - 46.3Mb
CPU usage - 15%
Remote Node
Test LAN Setup:
The following addresses are used at the VK2DOT QTH LAN to test the XR32 remote Nodes.
Callsign Windows IP
XR32 IP TCP/IP Town Port.
VK2AAL 192.168.1.8 192.168.1.28 44.136.16.200 Barrick Point 28
VK2XIC 192.168.1.9 192.168.1.29 44.136.16.201 Dapto 29
VK2VVV 192.168.1.10 192.168.1.30 44.136.16.202 Liverpool 30
VK2NE 192.168.1.12 192.168.1.32 44.136.16.204 Narara 32
VK2AFY 192.168.1.13 192.168.1.33 44.136.16.205 Kariong 33
VK2KJ 192.168.1.14 192.168.1.34 44.136.16.206 Wyong 34
VK2UTC 192.168.1.15 192.168.1.35 44.136.16.207 Belmont 35
All of the above nodes are connected to the XR32 Test Local Node VK2DOT –
Callsign Windows IP
XR32 IP TCP/IP Town .
VK2DOT-1 192.168.1.3 192.168.1.6 44.136.16.18 Niagara Park
At this point in time, all remote nodes will be delivered – Then remote sysops will have to change their Laptop IP parameters to reflect their own LAN setup. Below are changes necessary for such a change –
Change Windows
IP Number:
Go to the main Window of Windows and mouse click on the LAN icon. This will start the change of your IP address, of your Windows Kernel TCP/IP stack.
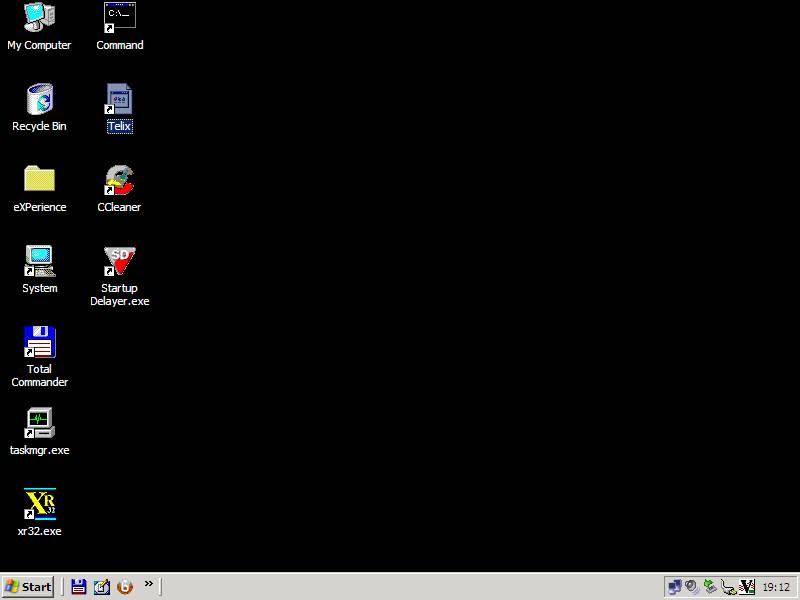
LAN
icon ^
Hold the right mouse button and select “Properties” in the menu that appears below.
Highlight “Internet
Protocol (TCP/IP)” below; Then mouse click on
Properties below.
Below – change “IP address”, “Default gateway” and “Preferred DNS server” to addresses appropriate to your LAN and ADSL Modem setup.
Mouse click on “OK” three times.
XRouter.cfg Setup:
This will start the change of your IP address, of your XR32 TCP/IP stack.
;--------------------------------------
PORT=12;
ID=Ethernet LAN
INTERFACENUM=12
CHANNEL=A
IPADDRESS=192.168.1.33
PACLEN=240
FRACK=5000
MAXFRAME=4
MHEARD=2
RFBAUDS=128000
ENDPORT
;
;--------------------------------------
Change the above IP address of 192.168.1.33 to a IP address not used on your LAN.
VK2DOT’s IP address –
;--------------------------------------
;
PORT=18
ID=AXUDP Link [XR ] VK2DOT-1 XR32
INTERFACENUM=14
IPLINK=220.245.50.125 ;
vk2dot.dyndns.org
; IPLINK=192.168.1.6 ; LAN for testing
UDPLOCAL=10098 ; For Remote Nodes only
UDPREMOTE=10098 ; For Remote Nodes only
QUALITY=220 ; AXUDP connection Quality
PACLEN=236
MHEARD=5
FRACK=5000
BCAST=FBB,MAIL
BCFROM=VK2DOT-4 ; From BPQMail BBS
PIPE=1 ; Fbb Headers for RF Port for WinPack Users
PIPEFLAG=1 ; UI Frames "NOT" addressed to nodecall/alias
ENDPORT
;
;--------------------------------------
Above, remove the ; from the start of IPLINK=220.245.50.125 and place in front of IPLINK=192.168.1.6. Thus you now have the correct IPLINK to the VK2DOT XR32 Node. NOT the IPLINK used for the VK2DOT LAN.
Modem Setup:
ADSL
Port 5800 to Port 5800 on machine 192.168.1.10 for TCP Named TCP 5800 or another address you have changed above to your Windows Kernel IP stack addressed.
Port 5900 to Port 5900 on machine 192.168.1.10 for TCP Named TCP 5900 or another address you have changed above to your Windows Kernel IP stack addressed.
Port 10098 to Port 10098 on machine 192.168.1.30 for UDP Named UDP 10098 or another address you have changed above to your XR32 IP Stack address.