Installing NdisXpkt on Windows XP
Author: A.N. Martin M1FDE
Date: 15-11-2006
Version: 5.0.1.1
What is NdisXpkt?
NdisXpkt is a kernel driver that gives Xrouter access to raw network packets.
NdisXpkt comes in two flavours, one for Windows 2000 and one for Windows XP.
Install only the correct one to match your system. The distribution package contains both, in separate directories named “Windows 2000” and “Windows XP”. Please make sure you’re reading the installation instructions for your version of Windows.
NdisXpkt is built entirely with sourcecode released by Microsoft for this purpose with very minor changes. I claim no copyright on this code whatsoever.
On the other hand please report any problems with the driver or with this documentation via the Xrouter Yahoo group and I will try to investigate.
Once installed, NdisXpkt will not be running unless Xrouter starts it to use its services. You can force it to start manually from a command window by entering:
net start ndispkt
at which point you should see the response:
The NdisXpkt service was started successfully.
Terse instructions for veterans
Be an Administrator.
Extract the files from the .zip archive to your HDD.
Open “Network Connections” from the control panel.
In the right-click menu from one of the network ports select “Properties”.
Here in the LAN connection properties box, click “Install”.
Select “Protocol” and click “Add”.
Click “Have Disk”.
Click “Browse”. Navigate to the directory where you put the files.
Select the “.inf” file and click “Open”.
Click “OK”.
The LAN connection properties box should now show “NdisXpkt”.
Click “Close” and you’re done.
Detailed instructions for rookies
To install drivers, you need to log in using an account with Administrator priviledges.
Extract the files from the .zip archive into a temporary directory on your hard drive. You can remove this directory when you've finished installing.
Remember where you put them – you’ll need them later.
Open the control panel (usually found in the start menu).
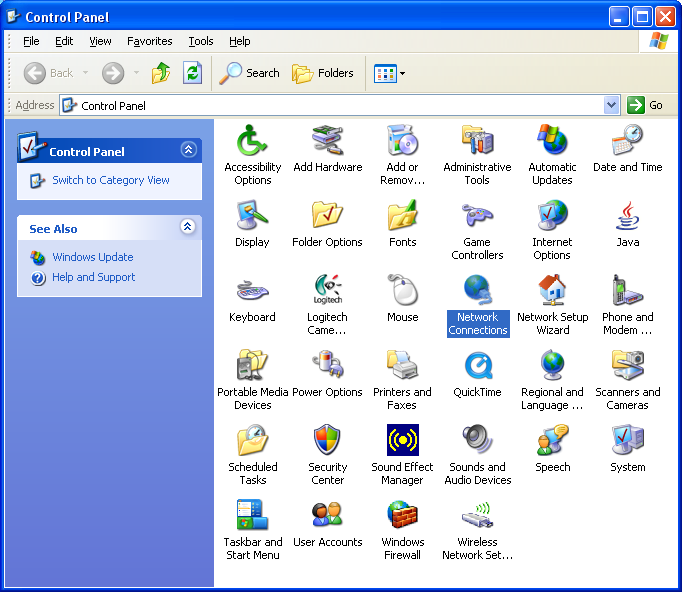
Double-click “Network Connections”.
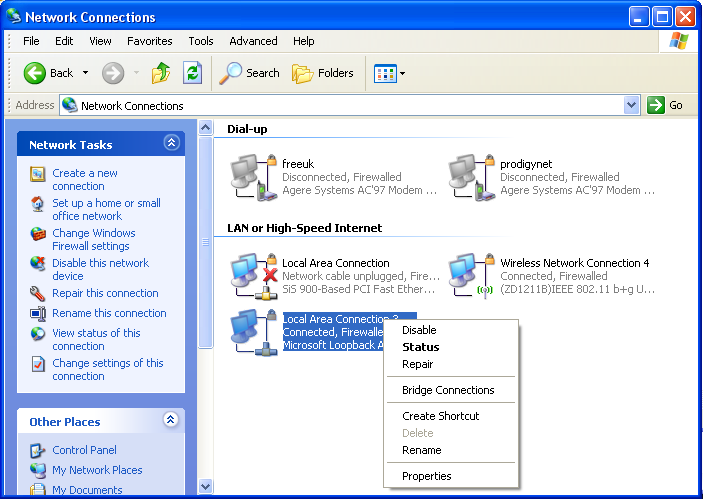
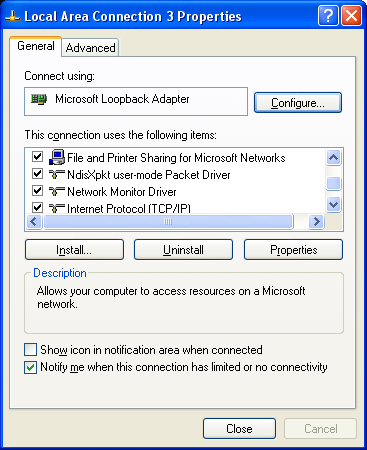
You may only have one or two network connections (ports) in the lower part of the pane. Select one of the network connections. Hold the right mouse button and select “Properties” in the menu that appears.
If you don’t have any networks in the lower pane, you need to install one. Either a network card, a USB network adapter, or a wireless LAN. This driver can’t be used without one.
If you really don’t want to connect an external network, but you do want to use Windows programs to connect to Xrouter via TCP/IP, then you have to install a dummy network device called the “Microsoft Loopback Adapter”.
It doesn’t matter which you choose, a new driver will bind itself with all of them – unless you come back and disable it.

This window shows the different protocols that are bound to this network device.
You may not have the same ones as this shows, it doesn’t matter. Lower down the
list is “TCP/IP” which you certainly will have. We want to install something, so click the button marked “Install…”
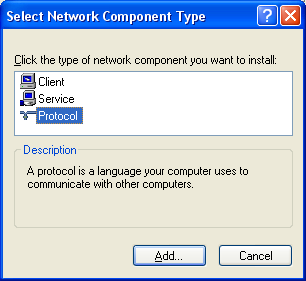
You’re adding a new protocol driver, so select “Protocol” and click “Add”.
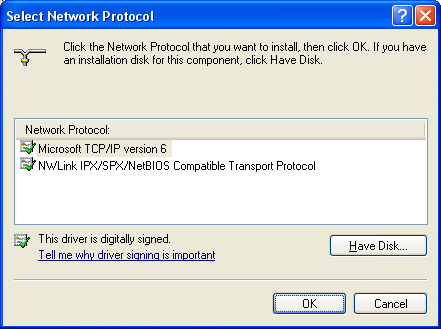
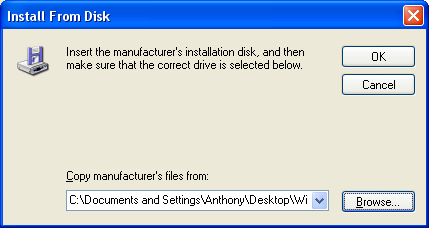
You don’t want any of the standard choices, so click “Have Disk”.
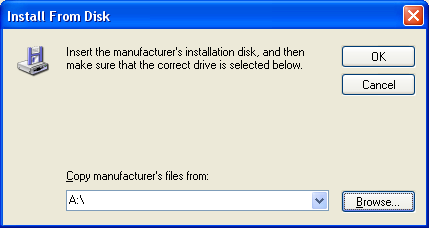
OK so you haven’t got a floppy, you put the files on your hard disk.
Click “Browse” and navigate to the folder where you unzipped the files.
It will only show you .inf files.
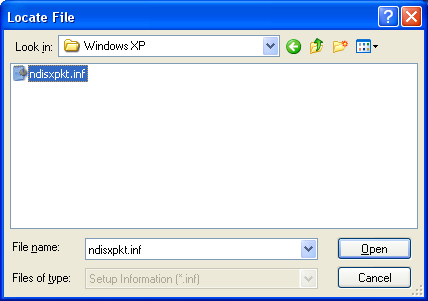
When you’ve found “ndispkt.inf”, select it and click “Open”.
Now click OK.
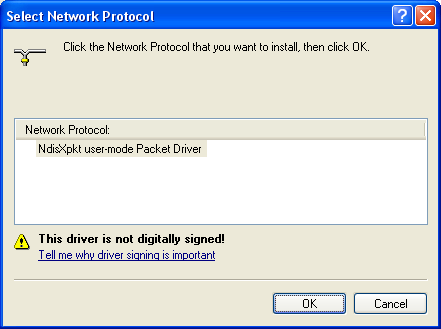
Digital signing is not required for NDIS drivers, so Microsoft tell me.
Click OK to install.
Your “Connection Properties” panel should now show “NdisXpkt” in the list.
Click “Close”.
Congratulations! You’re done.
Uninstalling NdisXpkt
Make sure you’re not running Xrouter otherwise the system may not allow the driver to be stopped and uninstalled.
Proceed as above until you reach the network connections properties box.
Select the NdisXpkt protocol in the scrollable list.
Click “Uninstall”.
Windows reminds you that uninstalling removes it from all network ports.
Click “Yes”.
At this point the protocol should disappear from the list.
Click “Close”.